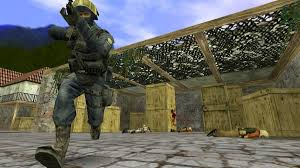
You’re watching a pro CS 1.6 player hold Long A on Dust2. Every shot lands. Every peek is perfect. They glide around corners like butter, spray control so smooth it looks effortless. You think: “How the hell do they do that?” The answer isn’t some secret trick or magic config. It’s thousands of hours mastering two fundamental skills: aim and movement. After 15+ years playing CS 1.6, I’ve learned that great aim isn’t about genetics or expensive mice. It’s about understanding mechanics, building muscle memory, and practicing the right way. Same with movement – bunny hopping, strafing, peeking – it’s all learnable. Today I’m breaking down everything I know about aim and movement in CS 1.6. No fluff, no theory – just practical techniques that actually work.
Table of Contents:
The CS 1.6 Aim Philosophy
Understanding What “Good Aim” Actually Means
🎯 The Truth About Aim
Most people think aim is: Flicking fast and hitting heads. Pure reaction time and mechanical skill.
What aim actually is: 80% positioning and crosshair placement, 20% mechanical skill and reaction time.
The pros don’t have superhuman reflexes. They position their crosshair where enemies will appear, so they barely need to adjust. They’ve practiced spray patterns until they’re muscle memory. They understand when to spray, when to burst, when to tap.
Personal revelation (2008): I spent months trying to “aim faster.” My K/D stayed at 0.7. Then I watched a demo from f0rest. He barely moved his mouse. His crosshair was always at head level, always where the enemy would peek. I started focusing on crosshair placement instead of flicking. K/D jumped to 1.3 in two weeks.
⚡ The Four Pillars of CS 1.6 Aim
- Crosshair Placement: Pre-aiming common angles (most important)
- Spray Control: Controlling recoil patterns in close/mid-range
- Burst/Tap Firing: Accurate shots at longer ranges
- Movement Integration: Stopping before shooting (counter-strafing)
Master these four, and your aim will be better than 90% of CS 1.6 players.
Crosshair Placement: The 80% Solution
The Most Underrated Skill
📍 What Is Crosshair Placement?
Definition: Keeping your crosshair positioned where an enemy is most likely to appear, at head level, BEFORE you see them.
Why it matters: If your crosshair is already on their head when they peek, you just click. No flick needed. Instant headshot.
Bad crosshair placement: Aiming at the ground, walls, random spots. When enemy appears, you flick up and over – slow, inaccurate.
Good crosshair placement: Crosshair at head level, pre-aimed at the angle where they’ll peek. They walk into your crosshair – click – dead.
The Head Level Rule
🎯 Always At Head Level
The golden rule: Your crosshair should ALWAYS be at head level (where an enemy’s head would be if they were standing there).
How to practice:
- Join an empty server (create_server or offline)
- Walk around the map normally
- Consciously keep crosshair at head level
- Check every corner by pre-aiming at head level
- Do this for 10-15 minutes daily
Pro tip: When moving around the map, imagine invisible enemies standing at every corner. Keep your crosshair where their heads would be.
Pre-Aiming Common Angles
🗺️ Map-Specific Crosshair Placement
Dust2 Examples:
Holding Long A (CT side):
- Crosshair at head level
- Aimed at Long doors (where T’s peek from)
- As they open doors, they walk into your crosshair
- Minimal adjustment needed
Pushing Cat (T side):
- Crosshair pre-aimed at top of Cat
- At head level where CT would be
- As you peek up, you’re already aimed
Checking Corners:
- Before rounding a corner, position crosshair where enemy’s head will be
- Example: Rounding corner to A site from Cat – aim at head level at goose/site
- As you peek, crosshair sweeps across common positions
My habit: After every death, I ask: “Was my crosshair at head level? Was I pre-aiming the right spot?” This self-analysis improved my crosshair placement more than anything else.
Spray Control & Recoil Patterns
Mastering The Spray
📊 Understanding Recoil
What is recoil: When you hold down fire, bullets don’t go where your crosshair points. They follow a predictable pattern, rising and deviating.
Key fact: CS 1.6 spray patterns are CONSISTENT. Every AK spray follows the same general pattern. This means you can learn to control it.
The spray pattern (simplified):
- First 3-5 bullets: Go mostly straight (accurate)
- Next 10-15 bullets: Rise vertically, then deviate left/right
- Remaining bullets: Wild, unpredictable
Spray control: Moving your mouse in the OPPOSITE direction of the recoil pattern to keep bullets on target.
Weapon-Specific Spray Patterns
AK-47 Spray Control
Pattern: Rises steeply up, then left, then right
How to control:
- First 7-10 bullets: Pull mouse DOWN continuously
- Next bullets: Pull DOWN and slightly LEFT
- After that: Small adjustments RIGHT
Effective range: Close to medium (spray), long range (tap/burst only)
Practice drill: Spray full clip at wall, observe pattern. Then spray again while pulling down to counteract. Repeat 50 times.
M4A1 Spray Control
Pattern: Similar to AK but less aggressive, more controllable
How to control:
- Pull DOWN (slightly less than AK)
- Small side-to-side adjustments
- M4 is more forgiving than AK
Advantage: Higher rate of fire, easier spray control
Disadvantage: No one-hit headshots through armor
When to Actually Spray
Good situations for spraying:
- Close range (< 15 meters)
- Multiple enemies rushing
- Emergency situations (no time to burst)
- Holding a choke point
Bad situations for spraying:
- Long range (30+ meters)
- Single target at distance
- When you need precision
Spray Control Practice Routine
🎯 15-Minute Daily Drill
Setup:
- Create offline server (create_server)
- Load de_dust2
- Go to Long A wall
- Buy AK-47 or M4A1
Exercise 1: Pattern Recognition (5 min)
- Spray full clip at wall WITHOUT trying to control
- Walk up and examine the bullet pattern
- Note how it rises and deviates
- Repeat 10 times
Exercise 2: Recoil Compensation (5 min)
- Spray full clip while pulling mouse DOWN
- Try to keep all bullets in a tight group
- Adjust pull amount until bullets cluster
- Repeat 10 times
Exercise 3: First 10 Bullets (5 min)
- Focus ONLY on controlling first 10 bullets
- These are most important in actual gameplay
- Aim for tight grouping
- Repeat 15 times
Do this daily for 2 weeks. Your spray will improve dramatically.
Burst Firing & Tap Shooting
Precision Over Volume
🎯 The Professional’s Choice
Why burst/tap is superior at range:
- First 2-3 bullets are highly accurate
- Recoil hasn’t built up yet
- You can adjust aim between bursts
- Less ammo wasted
Burst firing: 2-5 bullet bursts with brief pauses
Tap firing: Single shots with pauses
When To Use Each Method
🔫 Burst Firing (3-5 bullets)
Use when:
- Medium range (15-30 meters)
- Target is moving
- You need speed + accuracy
- Engaging multiple enemies
Technique:
- Fire 3-5 bullets
- Release mouse button
- Wait 0.3-0.5 seconds
- Readjust aim
- Fire again
👆 Tap Firing (1-2 bullets)
Use when:
- Long range (30+ meters)
- Target is stationary
- You have time for precision
- AWP-style engagements with rifle
Technique:
- Single click (1 bullet)
- Wait for recoil reset (~0.3s)
- Adjust aim if needed
- Fire again
Pro tip: On Dust2 Long A (CT vs T at doors), tap firing is optimal. Both players are stationary, long range – single precise shots win duels.
Movement Fundamentals
The Foundation of CS 1.6 Movement
🏃 Core Movement Principles
1. Moving = Inaccurate
In CS 1.6, your accuracy drops SIGNIFICANTLY while moving. Even one step makes your shots go wild. You MUST stop before shooting.
2. Momentum Matters
You have momentum. Pressing the opposite direction key (counter-strafing) stops you faster than just releasing the key.
3. Silent Movement
Walking (Shift) makes no sound. Running makes footsteps. Use this strategically.
4. Speed Variations
- Running: 250 units/second (default)
- Walking: 130 units/second (silent)
- Crouching: 90 units/second (very slow, more accurate)
Counter-Strafing: The Most Important Movement Technique
Stop Instantly, Shoot Accurately
⚡ What Is Counter-Strafing?
The problem: You’re moving right (D key), you see an enemy. You release D, but you keep sliding due to momentum. Your shots are inaccurate.
The solution: Counter-strafing. Tap the OPPOSITE direction key to stop instantly.
How it works:
- Moving right (D) → See enemy → Tap A briefly → You stop instantly → Shoot accurately
- Moving left (A) → See enemy → Tap D briefly → Stop → Shoot
Why this matters: The difference between stopping naturally (0.3s) vs counter-strafing (0.05s) is life or death in CS 1.6.
Counter-Strafing Practice
🎯 10-Minute Drill
Exercise:
- Load empty de_dust2
- Stand at T spawn
- Strafe right (D) → Tap A → Shoot at wall
- Strafe left (A) → Tap D → Shoot at wall
- Repeat 50 times
Check your work: Bullet holes should be tight groups. If they’re spread out, you’re not stopping completely before shooting.
Advanced: Practice while strafing around corners. Strafe out, counter-strafe, shoot, strafe back to cover.
Personal experience: Learning counter-strafing in 2007 was my biggest aim improvement. My accuracy went from 25% to 40% headshot rate just by stopping properly before shooting.
Bunny Hopping: Advanced Movement
The Speed Demon Technique
🐰 What Is Bunny Hopping (Bhop)?
Definition: Chaining jumps while strafing to maintain/gain speed beyond normal running speed.
Why learn it:
- Move faster than running (can reach 300-350 units/s)
- Harder to hit while in air
- Dodge AWP shots
- Rush bomb sites faster
- Looks cool (important)
Difficulty: High. Requires timing and coordination.
How To Bunny Hop
📚 Step-by-Step Bhop Guide
Setup First:
Bind jump to mouse wheel for easier timing:
bind "MWHEELDOWN" "+jump" bind "MWHEELUP" "+jump"The Technique:
Step 1: Initial Jump
- Run forward (W)
- Jump (scroll mousewheel)
- Release W immediately after jumping
Step 2: Air Strafe
- While in air, press A (left strafe)
- Move mouse left smoothly
- OR press D (right strafe) + move mouse right
- Do NOT press W while in air
Step 3: Land & Jump Again
- RIGHT before landing, scroll mousewheel (jump)
- Timing is critical – too early/late = lose speed
- Continue air-strafing
Step 4: Chain Jumps
- Alternate strafe directions: Left (A), Right (D), Left, Right
- Each jump should maintain or gain speed
- Keep rhythm consistent
Common Bhop Mistakes
Mistake #1: Pressing W While in Air
This kills your air control. Only use A/D + mouse movement while airborne. Press W only for initial speed.
Mistake #2: Bad Jump Timing
Jumping too early or too late breaks momentum. Practice the rhythm: land → immediate jump → land → immediate jump.
Mistake #3: Not Strafing Smoothly
Mouse movement should be smooth arcs, not jerky flicks. Imagine drawing smooth curves with your mouse.
Reality check: Bunny hopping takes weeks/months to master. Don’t get discouraged. Practice on bhop-specific maps (bhop_arcane, bhop_blue) where you can learn without getting shot.
Peeking Techniques
How Pros Check Corners
👁️ Wide Peek
What: Peek far from the corner
Advantage: You see enemy before they see you (angle advantage)
Use when: Aggressive plays, you expect enemy
Risk: You’re exposed to multiple angles
🚪 Tight Peek
What: Peek close to the corner
Advantage: Less exposure, can retreat quickly
Use when: Defensive holds, checking angles
Risk: Enemy sees you first
🔫 Jiggle Peeking
Technique: Quickly peek and un-peek repeatedly
Purpose: Gather information without committing
How:
- Strafe out (D)
- Immediately strafe back (A)
- Observe what you saw
- Repeat or commit
This baits AWP shots and gathers intel safely.
Complete Aim & Movement Practice Routine
30-Minute Daily Improvement Plan
🎯 Day 1-7: Fundamentals
5 min: Crosshair Placement
- Walk around de_dust2
- Keep crosshair at head level ALWAYS
- Pre-aim every corner
10 min: Spray Control
- AK spray at wall (5 min)
- M4 spray at wall (5 min)
- Focus on first 10 bullets
10 min: Counter-Strafing
- Strafe → Stop → Shoot
- Repeat 50 times
- Check bullet groupings
5 min: Deathmatch
- Apply what you practiced
- Focus on technique, not K/D
⚡ Week 2: Integration
Same routine but add:
- 5 min burst/tap firing practice
- 5 min bunny hop practice (if interested)
- 10 min deathmatch (increased)
Focus: Combining crosshair placement + spray control + counter-strafing in actual gameplay.
Reality check: You won’t see massive improvement in week 1. Muscle memory takes time. Stick with it for 2-3 weeks minimum.
My Personal Journey
15 Years of Aim & Movement Evolution
2005-2006: The Spray-and-Pray Era
I sprayed everything. Didn’t burst, didn’t tap. Crosshair always at ground level. K/D: 0.5. I was terrible.
2007: The Crosshair Placement Revelation
Watched f0rest demos. Realized he barely moved his mouse because his crosshair was always perfectly placed. Started practicing crosshair placement 30 min/day. K/D jumped to 1.0 in a month.
2008-2009: Counter-Strafing & Spray Control
Learned to stop before shooting (counter-strafing). Practiced spray control daily. K/D hit 1.5. Finally felt “decent.”
2010-2012: Bunny Hopping & Movement
Mastered bhop after months of practice. Movement became second nature. Could dodge AWP shots, rush sites efficiently.
2013-Present: Refinement
Still practice fundamentals. Even after 15 years, I spend 10 minutes before each session on crosshair placement and spray control. The pros do it too.
Key lesson: Aim and movement aren’t talents. They’re skills. Anyone can learn them with proper practice and time.
Related Guides
🗺️ Map Strategy
⚙️ Setup & Config
Final Words: Mastering aim and movement in CS 1.6 isn’t about genetics, expensive gear, or secret tricks. It’s about understanding mechanics and practicing correctly. Crosshair placement is 80% of good aim – keep it at head level, pre-aim angles. Spray control is learnable – practice against walls daily. Counter-strafing separates good players from great ones – stop before you shoot. Bunny hopping is optional but fun – takes months to master. I’ve spent 15 years refining these skills and I’m still practicing. The pros practice daily too. There are no shortcuts, but the path is clear: practice fundamentals consistently, and you WILL improve. See you at the top of the scoreboard.
